All posts by admin

How to Resolve McAfee Error Code ‘0’?

Recently downloaded McAfee Antivirus but could not install it due to McAfee Problem Code 0. Well, it is a common issue while installing the Antivirus, which might occur in your system due to various reasons. Here we will tell you all the details regarding McAfee Error code 0, including various causes and how to resolve them. McAfee is one of the best Antivirus preferred by most users due to its compatibility with Windows, MacOS, and various cyber-security solutions to keep your system safe from any internet threat. Read the article further to know more about error code 0.

What is McAfee Installation Error Code “0”?

McAfee Installation Error is an internal software error in McAfee that occur when you try to install the Antivirus, and the installation fails in your system. In the case of McAfee Error Code 0, the following messages appear on the screen:

  • Unable to Continue Installation. Trouble installing your McAfee software because of Error 0
  • Something went wrong with the McAfee installation. If you have trouble installing your McAfee software, Contact McAfee Support.

In case of this error, you need to try reinstalling the application again, or if not working, look for the possible measure below to resolve the McAfee Error Code 0.

What Causes McAfee Installation Error Code “0” on Windows and MacOS

Various causes due to which McAfee Error Code 0 can occur in your system are given below:

  • Presence of malware in your system that can stop or interrupt McAfee installation and trigger Error Code 0.
  • Incomplete download of the McAfee antivirus from the official website.
  • There might be some corrupt registry files in your system.
    Restriction for existing Antivirus

How to Deal with McAfee Installation Error Code 0

You must fix the Error Code 0 and install the McAfee antivirus in your system. You can install any other antivirus because, without any antivirus, your system will be vulnerable and has the chance to get infected by any malware or other virus. Because of the virus, your system will be compromised, and all your data and personal information will be at risk. Thus there is a necessity to have an antivirus in your system. Now that you have chosen McAfee antivirus, you can apply the given measure to resolve McAfee Error Code 0:

Use the McAfee Pre-Install Tool:

With the help of this McAfee pre-install, you can easily install the McAfee product which you have downloaded from the website. Follow the given steps to use the McAfee Pre-Install toll:

  • Go to the official website of McAfee. The download link for the pre-install tool will be available on the McAfee support page.
  • Click on the link to start the download. In the download folder, double-click on the file marked as “Pre-Install_Tool.exe.”
  • Read the warning message carefully. Accept the terms and conditions by clicking OK. The pre-installation will start automatically.
  • Now click OK and Close, and after that, restart your computer.

Now try to install the McAfee product which you have downloaded.

Re Download the McAfee Product from the Official Website

There might be a chance that the McAfee download will be incomplete or that you have downloaded the corrupt installer package of the McAfee product. In that case, you need to uninstall the incomplete McAfee product, delete the previously downloaded version and download it again on your system. Follow the given steps below:

Uninstall the McAfee Incomplete Installed Version

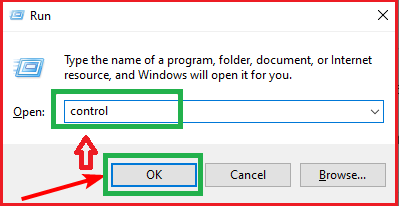
  1. Open the control panel. Select “Program” and “Program & Feature.”
  2. Select Uninstall/Change. Select McAfee.
  3. Click on the Uninstall option.

You can follow the given steps or type “McAfee” in the search menu and select the uninstall option. The given method can be applicable if you are using Windows 10 or 11.

Reinstall McAfee Again

Follow the given steps in order to reinstall McAfee again, and now try with a different browser:

  1. Visit the official website of McAfee and log in using your email and password.
  2. After that, select the product you want to install on your system.
  3. Click on the product, and the download will start automatically on your system.
  4. In the download folder, double the McAfee installer package.
  5. The installation wizard will appear on the screen. Accept the required terms and conditions, and the installation will start.
  6. After the installation has been completed, restart your system and check if the Antivirus is running properly.

Fix the DNS Issue to Resolve McAfee Error Code 0

McAfee installation issues can occur in case the DNS is slow. In that case, you might need to change your DNS settings to resolve McAfee Installation Error Code 0. Apart from that, any corrupt DNS setting might prevent your system from connecting to the Internet. In that case, you need to reset the DNS setting in your system. After that, try installing the McAfee product you downloaded to your system.

Try Different McAfee Product

If you want, subscribe to another McAfee product and try installing it in your system. The reason for that is your system might not be compatible with that McAfee product that you have downloaded. So go to McAfee’s official website, check another product and product requirements, and download it.

How to Prepare your System to Install McAfee Products

You need to check your system and look out for the given things in order to avoid any interruption while installing McAfee Antivirus on your computer:

  • Check that your system has the latest updates.
  • You need to uninstall any existing security software or Antivirus in your system.
  • Delete the old files if you have used any McAfee products earlier.

System Requirement to Install McAfee Products

Any trouble or hindrance in the McAfee installation can lead to Error Code 0. One of the reasons you cannot install McAfee on your computer is that your system needs to fulfill the minimum requirement to run McAfee Antivirus. Although different McAfee products have different requirements, there is some basic specification that every device system should have. Thus, Make sure that your system fulfill the following specification:

  • Microsoft Windows 11, 10, 8.1, or Apple iOS 13 or later
  • 2GB RAM
  • Free drive space of 1.3 GB
  • 1 GHz Processor

Conclusion:

So far, we have provided you with every detail through which you can resolve McAfee Installation Error Code 0 on your system and easily install the Antivirus. If you still have any trouble installing McAfee Antivirus, you can contact us from the number below or directly chat with us from the live chat option. Our tech support is available 24/7 to assist you with any issue related to McAfee and any other antivirus in your system.

How to Cancel McAfee Subscription and Claim Refund?

McAfee is one of the most widely recognized computer security application providing a variety of products ranging from basic file scan and virus removal feature to major security services like cybersecurity, rootkit detection, and many others. With more than 20 million users worldwide, McAfee is among the top antivirus program available in the market. However, no matter how great the service provided is, there will always be users who remain dissatisfied and want to cancel their subscriptions. For these users, here we will discuss how to cancel your McAfee Subscription and claim a refund, along with all relevant details regarding different McAfee products.

Why There is a Need to Cancel McAfee Subscription

There are many reasons why anyone should want to cancel their subscription to antivirus. Some of these reasons are listed below:

Not Every Security Requirement is Fulfilled by McAfee Security.

Every user has different demands, and not every antivirus consists of all the security features available or developed till now. Thus based on their requirement, a user might want to cancel their McAfee subscription and look out for another antivirus program available.

Budget Issues & Better Alternative

Another reason why user cancels their subscription might be the availability of other antivirus providing all the services at more reasonable prices, which matches their budget. Thus they subscribe to another antivirus.

How to Cancel McAfee Subscription

Follow the given list of steps to cancel your McAfee subscription.

  • Go to the official website of McAfee and log in using your credentials (Username and Password)
  • Once you are logged in, you can find the square grid option at the top of the page. Click on that option and select My Account.
  • Click on “My Account” and choose “Subscription.” Under the Subscription dashboard, you will find the cross symbol (X). Click on this button in order to cancel your subscription.
  • Click on “Request for Refund” once the subscription has been cancelled successfully.

The above steps for McAfee subscription cancellation are for the user who is using Windows or MacOS. In case you have a subscription on iOS or iPad, you need to follow the given steps

  • Open your apple device and go to settings.
  • On the top of the screen, click on your Apple ID, and after, tap on the “Subscription” option.
  • Now there will be a list of subscriptions for which you have paid through Apple ID.
  • Select the McAfee subscription and click “Cancel Subscription.”

You can also Cancel your McAfee subscription by contacting McAfee Customer Care Services

  • Contact or call McAfee Customer Services.
  • Speak with one of the technical experts and state your query.
  • You need to have all your credentials and customer details of your McAfee subscription.
  • Request for the cancellation.
  • Once your cancellation has been confirmed, you will receive a confirmation mail on your official Mail ID.

How to Claim McAfee Subscription Refund

In case you need to request a refund after McAfee subscription cancellation, follow the given steps:

  1. Visit the official website of McAfee support. There you will find an option marked “Request a Refund.”
  2. You will be redirected to a new page where you need to select your Country and again click on the option “Request a Refund.” Click on this option.
  3. Select the reason why you need a refund. Now you will be asked to contact McAfee customer services via Phone. Note down the number and call on it.
  4. Now you will be connected to a customer care executive.
  5. Provide your McAfee account details and state the reason why you need the refund.
  6. The technical team will check your eligibility for a refund, and once you have been approved, your amount will be refunded within a given time.

Other Alternatives to McAfee Subscription Cancellation

In case you want to take a break from McAfee services and wish to subscribe again in the future, instead of cancelling your subscription, you can turn off McAfee Auto-Renewal

  • Go to the official website of McAfee and log in with your email address and password.
  • Once you have logged in, go o the My McAfee section and select “Auto-Renewal.”
  • Under the Auto Renewal Membership, click “End Auto-Renewal.”
  • Tell the reason why you want to end your Auto-renewal.

Once you have turned off your auto-renewal, you will receive a confirmation mail. You can easily turn on your McAfee subscription by following the same steps and just clicking “Turn-on.” After that, read the McAfee renewal policy and click Agree.

Conclusion

So from the above discussion, we hope that you now have all the information regarding McAfee Subscription cancellation and how you can get a refund after you have cancelled your subscription. In case you have any trouble or require any assistance with McAfee Subscription cancellation, you can reach us by calling us at the number given or through live chat. Our technical team is available 24/7 to assist you and provide you with any solutions regarding McAfee security or any other antivirus.

How to Fix Skype Call Problems with Apple Devices?

Having trouble making a Skype Call through Apple Devices? Well, there might be plenty of issues that can occur while you make a Skype Call on Apple devices. You might face trouble with connectivity, or there might be a chance of low-quality audio or video, which can occur due to poor internet connection or any internal application error in Skype. However, you can resolve all these issues through various possible means. Here we will discuss how to fix Skype Call Problems on apple devices along with various details to troubleshoot Skype problems in Apple Device. Skype is one of the common platforms by Microsoft for video calls (long-distance calls) or professionally in the remote hiring process. Any issue with making the call can be big trouble. Read the article to learn how to fix Skype calling issues.

Why is Skype Not Working on my Apple Device?

Because of the following reasons, your Skype call get failed on your Apple device:

  • Poor Connectivity: One of the primary because for Skype Calls failed on iPhone is the poor internet connection, due to which you are unable to connect to the other end. There might be an issue with your internet connectivity, or there might be trouble on the other end. Thus you need to check your internet connection before you make a Skype call from your apple device.
  • Skype does not have access to your device Audio and Video Setting: Sometimes, while making a call, there can be a case where you are unable to listen, or the video of the other person is not showing. In that case, there might be a possibility that the Skype application does not have permission to access audio and video setting either on your device or on the apple device of other users.
  • Update the Skype or resolve any other internal software issue: Your need to update the Skype application on your Apple device as there might be a chance of connectivity issues with the older version of Skype. Apart from that, there might be some technical error, or there is not enough space to store data related to the Skype application. For that, you need to reinstall the Skype application on your Apple device.
  • Interference by Antivirus Program: Sometimes, due to security concerns, the antivirus/firewall does not allow any third-party application to run on your device. In that case, you need to temporarily disable the security application. After that, try to run Skype on an Apple device.
  • The issue with your device audio and video driver: It might be possible that Skype is running properly on your apple device, but the drivers of your sound card or webcam are not properly installed.

Problems with Notifications on my iPhone While Using Skype

In case the Skype App is not installed properly on your system, or you have not updated to the latest version, or any other error while running Skype. In all these cases, your Apple device might get crashed and not work properly. Because of that, you will not receive any notification on your Apple Device. A possible solution is that you delete and uninstall Skype.

How to Fix Skype Call Problems with Apple Devices?

There are plenty of measures that can be taken in case your Skype is not working on your Apple device properly, some of which are listed below:

1. Fix your internet Connection to fix Skype Call Issue

First, you need to look out for the primary reason why Skype Call Failed on your iPhone, which is the internet connection. Check your router and confirm whether the internet connection is stable or not. In case of any trouble with the internet, take the following measure:

  • Restart your Router.
  • Troubleshoot your Wi-Fi.
  • In case other websites are opening on the internet apart from Skype, then it is a bandwidth usage issue.

For that, close or stop other devices connected to the same wireless network and try to run Skype again.

2. Provide Audio and Video Permission to the Skype

Another common cause due to Skype Not Working On iPhone or other Apple devices properly is that Skype does not have permission for audio and video on your device. To resolve that, follow the given steps:

  • Click on the Apple Icon on your Mac device and then click system settings.
  • Select Privacy and Security in the sidebar and choose Microphone (for audio) and Camera (for video).
  • There will be a list of the app for which you can turn on the permission and select Skype for both audio and video.
  • Now make a test call through Skype.

In Case you are Using iPhone, Follow the Given Steps

  1. Open settings in your Apple Device
  2. Select the Skype application.
  3. Tap on the button next to the microphone and camera option.

3. Reinstall/Update the Skype App

In case you have not updated to the latest version of Skype on your Apple Device, that can create many issues like issues while making Skype calls and problems with notifications on iPhone. In that, follow the given steps:

Uninstall Skype on your Apple Device

  • For that, open settings, choose General and then select iPhone storage.
  • There will be a list of Apps from which to select Skype.
  • Click on the option “Delete App.”
  • From the above, you can also check which version of the Skype app you are using.

In case you want to reinstall, you need to go to the Apple Mac Store and search for the Skype option and download it.

4. Update/Install the Audio and Video Drivers

You need to install and update the audio and video driver to fix Skype Call Problems with Apple Devices. For that, you need to visit the official website of the device, provide system specifications and download the related drivers.

5. Close any VPN or Proxy Server while using Skype

Sometimes when you are using Skype through VPN, there might be a chance that your call has been blocked by the Skype server on the basis of security concerns. In that case, disable the VPN or any other proxy server while making a Skype call.

Conclusion:

We hope that now you can easily fix Skype Call Problems with Apple Devices and make a video or call without any trouble. The primary reason why your Skype Call Failed on iPhone is the internet connectivity. Apart from that, in case of any technical issues, you need to install Skype again. The solution for Skype call issues is discussed above step-by-step. In case you are still having any trouble, you can contact our Skype helpline number team. Our experts are available 24/7 to assist you and provide a solution as soon as possible.

How to Fix if Adobe Reader Fails to Install on Windows PC?

If you want to download and view PDF files and documents, then it is necessary that you have an Adobe reader on your computer. This software enables users to download and view pdf content from the internet or emails. It is a very useful and handy software and can be used to add pdf using sticky notes, type directly onto the pdf file pages, highlight and underline, and many more.
Since pdf is essential these days, it is advisable for users to download adobe reader in order to make their work a lot simpler. This software is compatible with both computers and mobiles. However, if you are interested and would like to get more insight about Adobe Reader Installation Failed on Windows PC, then you can simply read this blog.

Need an instant fix to Adobe issues? You can connect us anytime and get your solution immediately from the experts. 

What are the Causes of Adobe Reader Fails to Install on Windows PC Problem?

In this section of the article, we have mentioned a few of the reasons that are responsible for Adobe Reader not being installed on your PC:

  • You might face Adobe Reader Fails to Install on Windows PC problems due to insufficient Administrative Control.
  • The Adobe installer may face issues due to the Proxy server environment.
  • Another major reason behind Adobe reader won’t install on your system can be the improper installation of the App. In such a scenario, you first need to uninstall the App and install it again.
  • You might not be able to fulfill the System Requirements to use Adobe on your Windows device.
  • The presence of Antivirus software can also lead to the Adobe installation error.
  • Alternatively, there might be some issues with your Windows installer that are evoking the problem with Adobe.

What are the Minimum System Requirements to Complete the Process?

Now, let’s look at the minimum system specification that you must need to fulfill while installing Adobe on your Windows PC:

Specifications for 32 Bit and 64 Bit Adobe Reader

  • Processor : Intel® or AMD processor; 1.5GHz or faster processor
  • Operating System 32 Bit: Windows 11 (64-bit), Windows 10 (32-bit and 64-bit) version 1809 or later, Windows 8, 8.1 (32-bit and 64-bit)†, Windows 7 SP1 (32-bit and 64-bit), or Windows Server – 2008 R2 (64 bit), 2012 (64-bit), 2012 R2 (64-bit)†, 2016 (64-bit), or 2019 (64-bit)
    Operating System64 Bit: Windows 11 (64-bit), Windows 10 (64-bit) version 1809 or later, Windows Server 2016 (64-bit), or Windows Server 2019 (64-bit)
  • Ram Needed: 2 GB of RAM.
  • Screen Resolution: 1024×768
  • Minimum Hard Disk Space: 450MB of free hard-disk space
  • Browser: Internet Explorer 11

How to Resolve Adobe Reader Fails to Install on Windows PC problem?

After collecting all the important information about issues, let’s learn some easy fixes to resolve Adobe Reader Fails to Install on Windows PC Error.

1. Presence of Security Software

In case any kind of security software is present in your system, they see Adobe as Malware. Hence, you will find difficulties while installing it.
So, if you want a simple workaround to fix this problem, make sure that your Security software is updated to its latest version, as in the newer version of the antivirus; the vendors & service providers are working on eth issue to help you while installing Adobe in windows

2. Utilize the Program Installer and Uninstaller Troubleshooter

Using the Program Installer and Uninstaller Troubleshooter is the easiest way you can follow to fix the Adobe Reader installation issue.

  • Initially, you have to download the Program installer ad Uninstaller Troubleshooter.
  • Thereafter, Select the MicrosoftProgram_Install_Uninstall, and hit the Next Button. This will start the Troubleshooter.

MicrosoftProgram_Install_Uninstall

  • Now, choose the installing menu, and then tap on the Adobe Acrobat Reader DC app. After that, hit Next.

Adobe Acrobat Reader DC

3. Get the Program with Hidden Admin Account

At times, your Acrobat Reader fails to install issue can also be fixed by installing the program having Hidden Admin Account in your System. It is because sometime, you may fave this problem due to insufficient admin privilege, and the hidden account fix it for you.

  • Firstly, tap the Windows key and enter cmd in the search box.
  • Select the Run as an Administrator from the option mentioned below.
  • Now, enter the command below and Hit the enter button.
    net user administrator /active:yes

net user administrator /active:yes

Run as an Administrator

  • Next, you have to download the Adobe Acrobat Reader DC from the link mentioned.
  • At last, run the installer by following all the on-screen prompts.

4. Uninstall the installed Adobe Acrobat Reader Software

In case you have a copy version of Acrobat on your PC, and you are trying to install another new version, then you might face Adobe Reader’s fails to install issue. Thus to fix it, uninstall the already installed software:

  • Start the process by pressing the Windows + R key and entering Control.
  • Select the Ok tab to move forward.

Windows + R

  • Now, Just below the programs option, you can see Uninstall a Program menu, tap on it.

Uninstall a Program

  • Next, you have to right-click on the Adobe Reader app and select the Uninstall tab.

Adobe Reader app

  • Here, you have to follow the on-screen instructions to complete the process of uninstalling Adobe Reader.
  • End the process by downloading Adobe Reader again from its official website.

5. Generate a new Adobe Installation Folder

This solution only works in your favor if you have downloaded the latest version of Adobe Reader, but it is not being installed in your System.

  1. Begin the process by opening File Explorer.
  2. Next, you have to lick on the Local Disk (C:)
  3. Select the New Folder icon, and name it Adobe.
  4. In the end, Run the Adobe installer and then set the installation folder to the Adobe folder you just created.

Apart from that, there are a few other ways you can follow to fix the Adobe Reader Fails to Install on Windows problem:

  • You can download Acrobat using a different browser.
  • Download and Install Adobe Reader on individual workstations.
  • Check security & Active X Settings.

Bottom Line!

Suppose none of the above-mentioned ways won’t work in your favor. You can dial our TFN number and ask for assistance from the Adobe Experts. Through this post, we assure you that you have a better insight into Adobe Reader Fails to install on Windows issues. However, if you stumbled upon any of these steps and cannot proceed further, talk to our Adobe Support experts. You can mail our professionals to receive the best working solutions to the error.

How to Fix a Certificate Error in Internet Explorer?

Generally, Certificate errors occur when there is a problem with your SSL Certificate. Internet Explorer is an exceptional browser that keeps your information more secure by warning about it.
The majority of the users get the error related to the security certificate due to the incorrect setting of the date in the device. In case you are also facing a certificate error in Internet Explorer for the first time and don’t know how to fix it, then you must read this blog till the end.

Haunting for a way to fix certificate Errors in Internet Explorer? Call our experts anytime and grab the best assistance.

However, before fixing the Internet Explorer Certification Error, let’s first understand an SSL certificate.

What is SSL Certificate?

An SSL Certificate or Secure Sockets Layer is a like a code present on your Browser, which makes your Website look more authentic & trustworthy in the viewers eyes. It gives security for all kinds of online communication. It keeps all your sensitive information safe when you visit another website.

Sites that are not encrypted with SSL are flagged in Google Chrome, and almost all the users ignore visiting these sites. The sites with HTTPS in their URLs & lock icons in the address bar are encrypted & save you in case of data theft.

SSL Certification Error: Description

When your Browser is not able to recognize the SSL certificate present on your Website, this error happens. In such a scenario, a message will display on your screen saying.

“ERR_SSL_PROTOCOL_ERROR”
However, the message varies according to the Browser you are using and the type of SSL Certificate error occurring.

What are the Different Types of SSL Certification Errors?

Now, Let’s discuss about different types of SSL Certification Errors to learn more about the causes:

  • Certificate Not Trusted Error:

This error mainly occurs due to incomplete installation of the SSL certificate on the server site.

  • Mixed Content Error:

If you are providing both the safe & unsafe elements on your webpage, then you might can face the mixed content error.

  • Name Mismatch Error:

In case the name to which the SSL certificate is installed doesn’t match the name present in the URL, this error happens.

  • Expired SSL Certificate Error:

It happens when your Website’s SSL certificate is expired. The life of an SSL certificate is 398 days.

  • Generic SSL Protocol Error:

This error also occurs if your SSL certificate is expired or missing. However, it can also take place due to some mismatch in the client’s & server’s encrypted protocol.

  • Certificate Revoked Error:

When you receive “NET::ERR_CERT_REVOKED” as an alert on your screen, It means your SSL certificate is revoked now. It mainly happens due to an issue from the server’s end.

What are the Causes Behind the Certificate Error in Internet Explorer?

Before moving forward with the solutions to rectify the SSL Certification Error in IE, you must be aware of the reasons that may promote it. This is done so that you can apply the troubleshooting steps easily according to the reason for the error.

The security certificate of the Website would have been revoked.
Unmatched address of the Website and the security certificate
The Certificate you are using is outdated.
Certificate not from a trusted source

What are the Steps to Fix a Certificate Error in Internet Explorer?

Now that you have collected enough details about the Certificate error, let’s learn the ways to troubleshoot it.

Step 1: Adjust the Date & Time of the Computer

At times, a user might face certificate errors due to incorrect or expired date & time settings. Thus you need to set the correct date & time to fix the error.

Step 2: Disable the Windows Firewall

It might be possible that the Windows Firewall might be causing an interruption. So, turn it off by following the given steps:

  1. Navigate to the control panel of the device.
  2. Next, you have to click on the System & Security option.
  3. Thereafter, select the Firewall option to disable it temporarily.
  4. Now, Click on ok to save the changes.

Step 3: Make Changes in the Security Level

Making modifications to the security level can help Internet Explorer in fixing the error. To do so, check the following instructions:

  1. Initially, you have to launch Internet Explorer.
  2. Thereafter, Click on the tool button.
  3. Select the Internet tab.
  4. Now, click on the Security section to adjust the security zone settings of your device to medium.

Step 4: Revoke the Server Certificate

To revoke the server certificate:

  1. Open Internet Explorer
  2. Select the tools button and then the internet options.
  3. Now navigate to the advanced options.
  4. Look for security by scrolling down to the bottom of the page.
  5. Unmark the Publisher’s certificate revocation,
  6. Check for server certificate revocation
  7. At last, check for signatures on downloaded programs.
Bottom Line!

Dealing with the Certification Error in Internet Explorer is a bit complicated. But by following the resolution steps explained in this blog, you can collect all the important Knowledge required to fix it. However, if you ever get stuck while following the solutions, then you don’t need to worry. All you need to do is to get in touch with our highly-experienced professionals via the live chat facility. Apart from that, you may also send an email to our experts regarding your query and get the best answer possible.

How to Change Reset and Recover a Password in Juno Email?

Juno email is another type of web-based email system that enables you to access your email from any device. This email service can be further upgraded or elevated by adding secondary storage space and features through Juno webmail.

Like any other email provider, Juno allows you to use your computer or laptop to send and receive emails. But with time, you will encounter some type of errors that will require you to either change, reset or recover your Password. And when times like this arrive, you need to be prepared with the necessary course of action. So to help you prepare for times and situations like that, this blog has been created to give a comprehensive explanation of how to change, recover and reset a password in Juno email. If you want to learn about it, then go through this blog.

Wondering how to Change, Reset and Recover a Password in Juno Email and need quick assistance? Well, don’t worry!! Reach out to our experts to obtain quick tips to fix the error by calling on our Tollfree number. 

Why is it Required to Change, Reset or Recover a Password in Juno Email?

Before moving ahead with the steps to do something, we first need to understand why we need to do it; thus, let’s learn the causes by reading this section:

  • Your Juno Email is not working.
  • You forget the Juno Email Account Password.
  • Your Email Account is hacked.
  • It is recommended to change your email password every three months.

Now you have collected enough information about the reasons behind the Change, Reset, or Recovery of a Juno email Password. Let’s understand the process of doing so one by one.

Note: Whenever you are changing or creating a new password, make sure to make it safe & strong by following the given institutions:

  • The more the character of the Password, the safer it will be for you. (Minimum 12 characters)
  • The Password must be a mixture of Numbers & Alphabets.
  • Both uppercase and lowercase letters must be present in the Password.
  • Some special characters also needed to be included, like &,@, and #.
  • Ignore using your name, date of birth, or some well-known word as your Password.

How to Reset Juno Email Password?

Below we have mentioned the steps you need to follow to reset your Juno Email password:

  • Initially, open the official Website of email, and go to their login page.
  • Check the account section and click on the Link to Change your Password.
  • Now, in the required field, enter your Juno email account and your old Password.
  • Here, you will get redirected to a new page, where you have to enter your new Juno email account password.
  • Now, hit the Proceed tab.
  • After creating a new password for your Juno email, hit the Submit your request tab, and you are done with resetting your Juno Email.

How to Change your Juno Password?

Now, let’s discuss the procedure you need to follow if you want to change your Juno Email Password:

  1. Open any Browser, and go to the official Website of Juno Emails.
  2. Move toward the login page, and enter your Juno email account.
  3. Don’t fill anything in the Password field, and hit the Sign-in tab.
  4. A new instruction pop-up will appear on your screen, where you have to click on the Change Password menu.
  5. Moving ahead, you can see a Member id box, where you have to enter your Juno email address.
  6. Now, make a new password for your Juno Account and hit the Confirm tab.
  7. Next, after creating a new password, you have to hit the Submit you Request option.
  8. Here you will receive a new notification of your Juno Emails password change Configuration.
  9. Now, login to your Account using your Juno account and new Password.

How to Recover a Juno Account Password?

When you are not able to log into your Juno Account using your Password, then you can opt for the Recover option. To do so, go through the instructions discussed below:

  1. Open your Web Browser, and in its search box, provide the link to your Juno email account.
  2. Select Enter, and just under the ID section, look for the Help Centre tab. Click on Help Centre.
  3. Moving ahead, you have to Enter your Juno email address and select the tab to recover your Juno Password.
  4. Next, you have to choose to Recover the Password using Email or Text Message.
  5. Thereafter you will receive a recovery link from Juno’s end on your email or text.
  6. Click on that link, and enter a new, strong, and safe password.
  7. Now, re-enter the new Password to confirm it.
  8. You will then receive an OTP or confirmation code, enter it in the given box and hit the Next tab.

In case you want to recover your Juno password using your Email address, read the steps discussed below:

  • Open Juno’s official Website and enter your login id in the required field.
  • Leave the password box blank, and type your Juno Member ID.

Note: Every Juno user has their specific Juno Member ID and Pin.

  • Moving ahead, you have to send a message from your Juno account to  password@support.juno.com.
  • The team Juno will verify your account details in the message you have sent to recover your Password.

Conclusion!

We hope that by reading this blog, you get a brief idea about Changing, Resetting, and Recovering a Password in Juno Email. For any additional help, Dial Juno email customer service or you can simply use the help box mentioned below.


How to Install Avast Free Antivirus 2023 on Windows PC or Laptop?

Want to install Avast Free Antivirus on your Windows 10 System? If so is the case, then read this blog.

Avast antivirus is a family of internet security applications developed by Avast for various platforms, including MS Windows, Mac OS, Android, and IOS. It is known for providing high-end security to devices from virus and malware threats. It also rules the market with the highest share and is one of the favorite antivirus preferred by users worldwide.

If you want to know Install or Setup Avast Free Antivirus 2023 in your Windows 10 PC, then don’t worry. We are at your back to help you with proper assistance.

How to Download & Install Avast Antivirus for Windows 10 Devices?

In case you want a very simple antivirus software with basic tools like the virus scanner and junk cleaner, then you can opt for the free version of Avast Software. Whereas if you want more advanced features to protect your Windows device, you can choose the premium version. The premium version includes various services like data security, protection against malware, password manager, firewall, VPN, etc.

Note: The company also provides you with a 30 days trial. If you don’t find the software favorable for you in the initial 30 days, you are not supposed to pay anything.

Steps to Download & Install Avast Antivirus in Your Laptop & PC

Below we have given the steps you need to follow to Download & install Avast Antivirus on Windows 10 PC & Laptop:

  • Initially, you have to open your System and launch the Web Browser.
  • Now, type Avast antivirus in the search URL, and hit enter to reach the official website of Avast.
  • Next, scroll down on that page, and click on the button.
  • Thereafter, you will get the options of the Avast plans available for your device.
  • However, if you want an Avast plan that works on multiple devices, then go for a multi-license plan.
  • Next, hit the Buy Now option to reach the shopping cart page.
  • Read the overall Avast Plan details you are purchasing.
  • Thereafter, provide all the required details, and hit Continue.
    The billing page will open on your screen, go through it and complete the payment procedure.
  • Once you are done with the payment, choose the confirm option.

Note: Don’t refresh your page until you see the confirmation message. 

  • Moving ahead, enter your registered email address.
  • Now go to your Mail and check your inbox; team Avast has sent you an URL.
  • Hit that URL, and the installation process of Avast Antivirus software will begin.
  • After that, you have to navigate to Downloads and double-tap the design.
  • A permission box will appear on your screen; hit on the Allow tab, and Avast will start downloading on your device.
  • The setup activation window will pop up on your screen, where
  • you have to paste the key code present in your Mail.
  • Now hit the Activate button, and wait for a minute to get the confirmation email.
  • At last, restart your device, and you are done with the complete installation of Avast software in your Windows 10 device.

Steps to Stop the Avast Cleanup Premium’s Trial

With Avast cleanup premium, you get a trial offer for 30 days. You have the option to try this plan for the starting 30 days without paying anything. Moreover, if you haven’t provided your payment details while starting the trial, you are not supposed to cancel the subscription. This is because the plan will be deactivated on its own if you don’t purchase it.

Although if you have provided the payment details, you have to cancel the trial before 30 days, or else you have to pay for the subscription. To cancel the Avast antivirus Cleanup Premium free trial, check the steps mentioned below.

  1. Open the Web Browser and go to Avast antivirus.
  2. Now login to your Avast account and navigate to the next page for the subscription.
  3. Next, on the Avast cleaning plan page, hit the Unsubscribe option.
  4. Here a confirmation page will pop up on your screen.
  5. Hit the Confirm tab, and follow the instructions present on your screen, to cancel the subscription.
  6. At last, you will receive a confirmation mail from Avast end.

Ending Note!

After trying the described steps, if you still want any additional information related to the Installation process of Avast Free Antivirus on Windows 10 PC & Laptops, then it might be possible that you are doing something wrong. In such a situation, grab help from a professional by using the live chat option. Moreover, you can also email us your Query to get the step-by-step instruction that you can follow and fix the issue.

How to Prevent Your AVG Subscription from Auto-Extending?

Many of the software these days are coming up with auto-extending or auto-renewal features. Some users like this advantage, but some don’t, particularly when they are not using the product but it extends automatically. The same is the scene with AVG subscriptions.

AVG Antivirus solutions provide the utmost protection for all operating systems. It protects the devices against malware, Trojans, ransomware, and other viruses. It is widely known for network security and firewall protection and provides enhanced speed to your device. However, in some instances, users, after accessing the AVG antivirus for a year, don’t want to subscribe to it anymore. For that, they have to Prevent their AVG Subscription from Auto-Extending. Thus, if you are looking for a quick guide to prevent auto-extending, then read this blog.

How to Prevent AVG Subscription From Renewing?

No matter what is the reason, if case you want to stop the AVG subscription from auto-renewing online, then you can simply go through the given instructions:

  • Login to your AVG account,
  • Navigate to the Subscribe page,
  • Thereafter, Block the applicable Subscription.
  • Now, Cancel it by following the on-screen instructions.

Does AVG Antivirus Renew Itself Automatically?

Depending on the conditions of purchase, AVG Antivirus never renews it’s Subscription automatically. When your Subscription is about to end, the AVG team will start sending you alert messages. By following that message, you can renew your selected Subscription.

If you have made the Subscription of AVG before it expires, the new Subscription will begin on its own.

How can I know More About my AVG Subscription?

Do you want to get more details about your AVG subscription? If yes, then you must have to follow the given method:

  1. In the beginning, Go to the Sign in Page of AVG
  2. Enter your AVG login credentials to sign in to your Account.
  3. Now, click on the Subscription tab.
  4. On the next page, you can see the list of all the Active plans in your Account.

What are the Steps to Remove my Credit Card Details from AVG?

At times, the customer wants to delete their Credit Card details from the AVG account. Sometimes, it is done due to privacy concerns, whereas in most instances, it is done to Prevent Your AVG Subscription from Auto-Extending.

  • Go to the signing page of AVG, and provide your registered email address.
  • Moving ahead, click on Request Access.
  • Now, navigate to your mail inbox, and look for the new email you received.
  • Hit the “Go to Portal” tab, then select the Support Button.
  • Now, scroll down to that page to reach the option of Data deletion.

Important: Deleting your data will delete your Credit Card details, along with the data attached to current active subscriptions. 

How to Cancel an AVG Subscription on Mac or Windows?

Now, let’s look at the steps to cancel the AVG subscription on your Mac or Windows device:

  1. Initially, open account.avg.com.
  2. Next, you have to log in to your AVG account.
  3. Select the My Subscription option.
  4. Now you have to select your Active plan and then hit the Unsubscribe tab.

However, if you have made the Subscription in the last 30 days, you can ask for a refund as well. To claim a refund, undertake the given steps:

  • Open avg.com and select the Support option.
  • Now Click on the Contact Option available below the Search box.
  • Thereafter select the Need a Refund option.
  • Now, you have different options for multiple devices. Choose the Windows option there.
  • Moving ahead, you have to select the Phone or the chat option so that an AVG representative will join you and request your refund.

Note: You must need to have your AVG invoice number or activation code while requesting for a refund. This is done to ensure your purchase details.

  • Now, wait for the next 3 to 5 days to get the refund.

How to Cancel AVG Subscription on Android Device?

If you are an Android Device user who has purchased AVG using Google Play Store, then you can go through the instructions mentioned below:

  • Open the Play Store on your device and hit the Profile tab, present at the top of the screen.
  • Choose the Payment & Subscription option.
  • Now, hit Subscriptions, and look for AVG from the available list.
    Select the Cancel Subscription tab.
  • Now, from the drop-down list, select a reason why you are canceling.
  • Moving ahead, click on Continue, and confirm your Selection, and here you are done.

To get the refund, you can simply visit avg.com and follow the same steps as mentioned above.

How to Cancel AVG Subscription on iPhone or iPad?

In case you have purchased the AVG Subscription using the Apple store, then you need to learn this procedure:

  1. Open Settings on your iPhone or iPad, and click on your Apple ID.
  2. Now, hit the Subscription option.
  3. Search for AVG and tap on it.
  4. At last, hit the Cancel Subscription button, and select the Confirm tab.

Here you are done with the cancellation of AVG Subscription on any iOS Device.

Suppose you are canceling your Subscription in the initial 30 days only; then you can ask for your refund from Apple.

  1. Open your Browser, and go to the reportaproblem.apple.com.
  2. Now, log in to your Account using Apple ID.
  3. Next “What can we help you with?” drop-down menu will appear on your screen. There you have to choose Request a refund and tap on the reason behind it.
  4. Thereafter, Appl will give you a list of your Active plans, click on AVG and hit the Submit button.
  5. Next, apple will get in touch with you for confirmation of your refund.
  6. After that call, you will receive the refund in the next 3 to 5 days.

Wrapping it up!

We hope that this blog will help you Preventing Your AVG Subscription from Auto-Extend. However, if you are still facing any difficulty, directly reach out to our professionals through AVG Antivirus customer service or a live chat facility and resolve your issue.

How to Fix Avast Billing and Refunding Issues?

The antivirus Avast offers its paid and free versions with enhanced security features. Those users who require high-tech security opt for the paid version else; the free version is enough. Everything is great about the features of the Avast antivirus. But, sometimes, its users get into trouble with Avast Billing and Refunding Issues.

So, if you are one of the Avast users who is experiencing problems during the refund of your money or canceling the Billing, then this blog is perfect for you. Go through it to learn every detail that you must know while fixing the Billing or refund issue with the Avast Antivirus.

However, in case you need instant Help, you can call our tollfree number and grab the best assistance immediately.

Troubleshooting Steps for Avast Billing Issue

Let’s now look at the steps which can help you rectify the Billing Problem in Avast antivirus:

  • Go to the Official website of Avast Antivirus.
  • Next, enter the login credential and sign in to your account.
  • Now, you have to go to the Billing menu.
  • From the list of actions available in the billing menu, select one according to your need.
  • Go through institutions, and modify the option if needed.

This will help you resolve your billing issue; however, if this won’t work for you, then you can simply use the Live chat option available below and ask for all your Queries from an expert.

How to Cancel Your Avast Subscription and Get a Refund?

In case you have purchased the product and want to cancel it later, you can find the steps to do in this section. Keep your billing & subscription details nearby you to eliminate any hindrance in completing the refund process.
Users have three ways by following which they can cancel their Avast subscription. You can select any of them according to your choice.

Note:

  1. Avast can only refund you if you have purchased the product from the Avast Official website.
  2. You are eligible to request the refund within the starting 30 days of the product purchase.

1st Cancellation Method: Use the Avast Order Portal

This is a handy way to cancel your subscription, which involves disabling the Auto-renewal option available in the Order Portal.

  • Initiate the process by reaching the Avast Order Portal.
  • Next, you have to enter your Order number along with the password to complete the login process.

Note: In case you have forgotten any login credentials, then you can check the inbox of the registered email account.

  • After login, Select the Manage Subscription tab.
  • Now, on the next page, look for the Automatic Renewals, and turn it off.
  • You may receive a pop-up alert; verify it by hitting the Disabling Automatic Renewal links.
  • After that, you will get a Configuration Email for the confirmation of the Cancellation process.

2nd Cancellation Method: With the Help of Avast Account

In case the first method seems complicated to you, then try to complete the process using your Avast Account.

  1. In the beginning, you have to launch Avast.
  2. Now, click on the Sign-in tab to reach the Avast Account Section.
  3. Login to your Avast Account using the registered email.
  4. Thereafter, navigate to the License option & hit on the Deactivate Auto-Renewal Subscription to cancel it.
  5. Next, you will receive a cancellation confirmation email from Avast Antivirus.

3rd Cancellation Method: Using Avast Customer Support

If you are not comfortable with the above two methods, then you can try to seek assistance through Avast Customer Support. There are multiple ways to do so, including calls, emails, live chat, etc. You choose any of them according to your needs & preference.

Steps to Contact Avast Antivirus Customer Care via Phone Call

If a user wants to cancel their Avast Subscription immediately, then in such scenarios, they can dial the Avast Antivirus Helpline Number. An expert will join you on call and provide you with step-by-step details to cancel your product subscription. These experts are highly skilled, with years of experience available to help you out all around the globe.

Grab Help from the Team Using Email or Live Chat option

In case you want a more precise way, then you can simply write down an email and send it to info@getcontacthelp.com. After sending the email, wait for sometime to get a revert from the Professionals.

Or you can also opt for a live chat by clicking on the Help box mentioned below.

After contacting Avast Customer Support, ask the expert to cancel your Product subscription. They will ask you for a few details, and according to that, they will assist you in doing so.

Procedure to Apply for DRI Avast Refund Request

Once you have received the cancellation Confirmation Email, then only you can go with the request to cancel your refund. You can follow the given steps for DRI Avast Antivirus Refund.

  1. Initiate the process by visiting the Avast official website.
  2. Thereafter, look for the Sales & Refund option.
  3. Enter all the details they are asking for.
  4. Wait for a few minutes, and customer service will respond to your refund request and confirm it.

Note: After the confirmation of the refund request, you will receive your money within the next 30 days.

Bottom Line!

In the above section, we have given a brief detail about the process to resolve Avast Billing and Refunding Issues. However, in case you need any additional help, use the live chat option to get in touch with a professional. These Avast antivirus experts are technically trained and well-qualified, and ready to fix all your issues.


How to Fix Avast UI Failed to Load Error?

An Avast UI failed to load Error occurs when an incorrect windows service configuration triggers it. It might stop the whole program from running. If you have confronted the same problem while using the Avast antivirus and want to fix it permanently, then you have to read this blog.

In case you have no time to troubleshoot the issue, then you must reach out to Avast customer service number by dialing our TFN as early as possible.

What are the Root Causes Behind Avast UI Failed to Load Error?

Before moving ahead with the solutions to fix Avast UI Failed to load error’, you need to understand the causes that may promote the problem. This is done so that you can simply perform the troubleshooting steps according to the reason behind them.

  • Inappropriate Configuration of Windows Services
  • The Software is blocked by other third party software.
  • You have installed the latest version of Windows that is not expected to configure Avast antivirus.
  • Presence of Corrupted files in your Avast software.
  • Some specific remote access services stopped working on your Software.

Apt Method to Rectify Avast UI Failed to Load Error

Now after collecting all the knowledge about Failed to Load Error in Avast & its causes, let’s discuss the steps you need to follow to rectify this Error.

1st Troubleshooting: Reboot your Avast Application

The simplest thing a user can do while facing UI Failed to Load Error is restart the Avast app. This will refresh the UI and may rectify the issue.

Note: Close the Software before going further with the steps to restart and launch it again.

  1. Initiate the process by right-clicking on the blank space.
  2. Click on the Task Manager.
  3. Now, navigate to the Process tab, and scroll down until you find Avast Processes in the active options.
  4. Select Avast
  5. Moving ahead, hit on the End Task option. This will shut the process completely.
  6. Note: Follow the same process for all the Minecraft Processes.
  7. Now, once you are done with quitting all the Avast Processes, launch the Avast app again, and check if you can load the UI now.

2nd Troubleshooting: Turn on the Remote Desktop Services

In case the Avast app is not working properly in your Windows 10, then you may not have configured the Remote Desktop.

  1. Initiate the process by pressing Windows+R to open the Run box.
  2. Then in the search field, enter services.msc and hit Ok.
  3. A new Service Window will appear on your screen, in that you have to hit on the Remote Desktop Services menu.
  4. Next, tap on the Properties from the Context options tab.
  5. Now, select any option that is next to the Start-up type section.
  6. Thereafter, select one option from the drop-down menu.
  7. Important: Ensure that Automatic is Marked.
  8. In case the services are not running properly, you will receive a text “Service status: Stopped” o your screen.
  9. Now, to make sure that the service is running, hit on the Start button.
  10. Now, wait for some time so that the services can start instantly.
  11. Once you configure the services, hit on Apply and then shut it by tapping an ok button. Close the Service window and check if the application is now working properly or not.

3rd Troubleshooting: Update the Avast Software to Its Latest Version

At times, the Error can be fixed just by updating the app. Thus, it is recommended to try to rectify the UI load failed Error by updating the Software properly.

  1. In the beginning, Press Windows +R on your keyboard.
  2. Next, you have to click on the Apps and Features option from the given menu.
  3. Look for Avast Antivirus or some other Avast app in which you are facing UI not loading problem.
  4. Select the app, and tap on Uninstall button.
  5. Moving ahead, click on the update option & wait for the next few minutes so that the Software can find the latest version to download.
  6. Now, the installation process will be automatic.
  7. Note: This can take a while to complete, depending on your System’s configuration.
  8. After completing the repair steps, launch the defective Avast app again.

4th Troubleshooting: Run the Repair Tool

If the above process doesn’t fix your issue, then you can try to go with the repair option.

  1. Press the Windows+X key to begin the process
  2. Next, you have to select type Apps & Features option.
  3. Look for the Avast app you are facing issues with, then tap on it.
  4. Now, hit the Uninstall tab, and select the repair tool.
  5. This will completely reconfigure the Avast software.
  6. It might be possible that an authorization message will pop- up on your screen.
  7. Select Yes to start the repair process.
  8. Now, wait for a few moments; once the repair process is finished, a new message will appear on your screen saying, “The product was successfully updated.”
  9. Click on Done, and open the Software again.

5th Troubleshooting: Delete all the Other Antivirus Software Present on Your Screen

If none of the above processes works in your favor, then it might be possible that your device has different Antivirus antivirus software that are creating hindrances for Avast; thus, uninstall them.

  1. Open the QuickLink menu by hitting Windows +X key
  2. Thereafter, navigate to the Apps & Feature option.
  3. Now scroll down until you find some Antivirus software other than Avast.
  4. Once you find it, select it and tap on Uninstall button.
  5. Next, hit Uninstall and follow the on-screen prompts to complete the process.
  6. After uninstalling all the other antivirus, restart your System, and open the app to check if the issue is rectified.

Final Note!

The steps discussed in this post can help in fixing Avast UI Failed to Load Error. If you are still facing any difficulty while implementing these solutions, connect with us via our chat option or email us to schedule a callback.